


How to Fix a Flat Tire on an Electric Scooter
NaveeScooters
Table of Contents
An electric scooter flat tire is usually repairable. Riding on it is not. Continuing on a deflated tire can damage the tire, rim and, on a driven wheel, the motor assembly.
The correct repair depends on what has failed. A tubed tire may have a punctured inner tube. A tubeless tire may be leaking through its tread, valve or bead. Before reaching for a tire lever, identify the source of the leak and decide whether the damage can be repaired safely.
How Can You Diagnose an Electric Scooter Flat Tire?
Not every soft tire has been punctured. Air may be escaping through a loose valve core, damaged valve stem, incorrectly seated bead or small hole that is difficult to see. Temperature changes can also reduce pressure without causing a puncture.
Begin by inflating the tire to the pressure specified in the scooter manual or on the tire sidewall. Listen for escaping air and apply soapy water around the valve, tread and rim. Growing bubbles reveal a leak. If the tire loses pressure without producing visible bubbles, monitor it with a pressure gauge over several hours.
Finding the leak shows what has failed. Deciding how to fix it requires one more piece of information: how the tire holds air.
A tubed tire stores air inside a removable inner tube. A tubeless tire seals directly against the rim. A solid or honeycomb tire does not contain pressurized air and therefore cannot suffer a conventional flat, although it can still crack, deform or wear out.
Check the product specifications or owner’s manual if the tire type is unclear. Do not assume that every pneumatic tire contains an inner tube. The wrong repair kit or replacement part will not solve the leak.
Once the tire type and damage have been identified, the appropriate response is usually clear.
| Tire condition | Recommended action |
|---|---|
|
No visible damage and minor pressure loss |
Reinflate and monitor |
|
Loose or leaking valve core |
Tighten or replace the valve core |
|
Small puncture in an inner tube |
Patch the inner tube |
|
Small tubeless tread puncture |
Use an approved plug, patch or sealant |
|
Damaged valve stem |
Replace the valve or inner tube |
|
Sidewall cut or damaged bead |
Replace the tire |
|
Bent rim or damaged motor cable |
Seek professional repair |
|
Cracked or badly worn solid tire |
Replace the tire |
The location of the damage matters as much as its size. A small hole in the main tread may be repairable. A cut in the sidewall or bead is not. These parts flex and carry load, so a temporary patch may fail without warning.
What Tools Do You Need for Electric Scooter Flat Tire Repair?
Patching the hole is often the easy part. Removing and reinstalling an electric scooter wheel can be harder, particularly when the motor is built into it.
The exact tools vary by model, but an electric scooter flat tire repair may require:
-
The correct sockets, wrenches and hex keys
-
Suitable tire levers
-
A pump with an accurate pressure gauge
-
A tubed-tire patch kit
-
A tubeless repair kit when applicable
-
Soapy water for locating leaks
-
Protective gloves
-
A torque wrench if axle torque is specified
Turn off the scooter and disconnect the charger before beginning. Remove the battery only if the model is designed to let the user do so. Place the scooter on a stable repair stand or protected work surface. Do not balance it where it can fall or rest it directly on the display, throttle or brake controls.
Take photographs of the wheel before removing anything. Axle washers, spacers and anti-rotation hardware may have a specific order and orientation. Reinstalling them incorrectly can affect wheel alignment or allow the axle to move.
A motorized wheel requires additional care. Its cable may pass through or alongside the axle and can be damaged by twisting, pulling or trapping it beneath a washer. Disconnect only the connectors identified in the model instructions. Never cut or modify an unfamiliar electrical cable merely to remove the wheel.
Avoid bending the brake disc or contaminating it with grease, soap or tire sealant. If the scooter uses drum brakes, record the position of the cable and adjustment hardware before disassembly.
If the manufacturer’s instructions do not treat the wheel as user-serviceable, professional repair is the safer choice.

How Do You Repair a Tubed Electric Scooter Tire?
A tubed tire stores air inside a separate rubber tube. The outer tire provides grip and protection, while the tube creates the airtight chamber. Repair therefore requires opening the tire and removing the tube.
Remove the Wheel
Switch off the scooter and place it securely on a stand. Remove any covers that block access to the axle nuts. If it is a motor wheel, disconnect the approved motor connector without pulling on the wires.
Loosen the axle hardware while supporting the wheel. Keep washers and spacers in order as they come off. If the wheel uses a disc brake, guide the rotor carefully out of the caliper.
Some scooters use split rims or model-specific wheel assemblies. Follow the product manual rather than forcing the tire off with generic tools.
Remove the Inner Tube
Deflate the tube completely by pressing the valve core. Insert a tire lever beneath one side of the tire bead and work gradually around the rim. Aggressive levering can pinch the tube, scratch the rim or damage the bead.
Once one side of the tire is free, remove the tube. Begin at the side opposite the valve and pull the valve stem out last.
Locate the Puncture
Inflate the tube slightly. Listen and feel for escaping air. If the puncture remains difficult to find, place sections of the tube in water and look for bubbles.
Mark the leak, but do not patch it immediately. First find out what caused it.
Run a cloth carefully around the inside of the outer tire. A nail, wire or piece of glass may still be embedded in the tread. Using bare fingers can cause a cut, so gloves or a cloth are safer. Check the rim for sharp edges and inspect the valve opening for damage.
Failing to remove the object that caused the puncture usually produces another flat almost at once.
Patch the Inner Tube
A small puncture in an otherwise healthy tube can usually be patched. Clean and dry the area, prepare it according to the patch-kit instructions and apply a patch that extends beyond the damaged section.
Press the patch firmly into place and allow the adhesive to set fully. Inflate the tube slightly and check the repair for leaks before putting it back inside the tire.
Do not attempt to patch a torn valve stem, long split or badly deteriorated tube. These conditions require replacement rather than a larger patch.
Reinstall and Test the Tire
Add just enough air to give the tube its shape. Insert the valve first, then place the rest of the tube evenly inside the tire. It should not be twisted or folded.
Work the tire bead back onto the rim without trapping the tube beneath it. Inflate slowly and check both sides of the wheel. The bead should sit at an even height around the rim.
Reinstall the wheel, spacers and axle hardware in their original positions. Route the motor cable away from moving parts and reconnect it securely. Tighten the axle hardware to the manufacturer’s specification.
Spin the wheel by hand before riding. It should rotate evenly without rubbing heavily against the brake or pulling the motor cable. Check the pressure again after a short, low-speed test.
How Do You Repair a Tubeless Electric Scooter Tire?
A tubeless tire holds air between the tire and rim. There is no inner tube to remove, which can make a small tread puncture easier to repair. Leaks around the valve or bead can be more troublesome.
Apply soapy water to the tread, valve and both sides of the bead. Each location points to a different repair.
Repair a Small Tread Puncture
A small puncture in the central tread area may be repairable using a product approved for the tire and scooter. Depending on the design, this could be a tubeless plug, internal patch or compatible sealant.
Remove the object only when the repair materials and air pump are ready. A nail may be slowing the leak; pulling it out can release the remaining pressure quickly.
Follow the repair-kit instructions closely. Do not enlarge the hole more than required, and do not assume that a temporary roadside plug is a permanent repair.
Inflate the tire to the specified pressure, apply soapy water again and confirm that no bubbles form. Check the repair after the first short ride and again the following day.
Fix a Valve Leak
Bubbles forming at the centre of the valve usually indicate a loose or damaged valve core. A compatible valve-core tool may be used to tighten it gently. Overtightening can damage the core.
Bubbles around the base of the valve suggest a different problem. The valve stem or its seal may need replacement, which often requires removing the tire from the rim.
Valve faults are cheap when identified early. Ignoring them leads riders to keep adding air to a tire that will never hold it.
Address a Bead Leak
Bubbles between the tire and rim indicate a bead leak. Dirt, old sealant, corrosion, tire damage or a bent rim may be preventing an airtight seal.
Deflate the tire and inspect the bead and rim. Clean them only with products compatible with the tire and wheel. Do not force a visibly damaged bead back into service.
Reseating a tubeless tire may require a fast supply of air. A small hand pump may not deliver enough volume to push the bead into place. If the bead will not seat evenly, use a repair shop rather than experimenting with excessive pressure or flammable methods.
When Should You Patch or Replace an Electric Scooter Tire?
A patch is suitable only when the damage is small, accessible and confined to a repairable part of the tube or tire. Replacement is safer when the structure has been weakened.
Replace an inner tube when:
-
The valve stem is torn or separating from the tube
-
The tube has a long cut or several punctures
-
The rubber is cracked, stretched or deteriorated
-
A previous patch is failing
-
The tube does not match the tire size or valve position
Match the replacement tube’s diameter, width and valve type to the scooter. A tube that fits around the rim may still fail if it is too narrow, folded inside the tire or fitted with the wrong valve angle.
Replace the complete tire when it has:
-
A sidewall puncture or deep cut
-
Exposed cords or internal reinforcement
-
A torn or distorted bead
-
Severe cracking or tread separation
-
A hole that exceeds the repair kit’s limits
-
Repeated leaks after a previous repair
-
Tread that has worn smooth or unevenly
Repeated flats may indicate more than bad luck. The tire may contain hidden debris, the rim may have a sharp edge, the tube may be the wrong size or the rider may be using insufficient pressure. Replacing another tube without identifying the cause merely resets the problem.

When Should You Use a Professional Electric Scooter Repair Service?
DIY repair makes sense when the damage is minor, the correct parts are available and the wheel can be removed without disturbing unfamiliar electrical components.
Professional repair is recommended when:
-
The motor cable must be opened, repaired or rerouted
-
The axle, rim or brake rotor is bent
-
The tire bead will not seat correctly
-
The wheel does not spin straight after installation
-
The scooter produces a motor error after reconnection
-
The required parts cannot be confirmed
-
The repair may affect the product warranty
Do not ride to the repair shop on a flat tire. Walk the scooter, transport it in a vehicle or ask whether the shop offers pickup. A few kilometres of riding can turn a patchable puncture into a damaged tire and rim.
How Can You Prevent Electric Scooter Flat Tires?
Most flats are easier to prevent than to repair. Tire pressure is the place to start.
Underinflation allows a tubed tire to collapse sharply against the rim, which can pinch the tube and create two small cuts. It also increases heat and tire deformation. Excessive pressure creates a harsher ride and may reduce the tire’s ability to absorb impacts. Use the pressure specified for the scooter and check it with a gauge rather than merely squeezing the tire.
Pressure should be checked regularly and before longer rides. Cold Canadian weather can reduce measured pressure, while warmer conditions can raise it. Follow the manufacturer’s instructions rather than using one universal pressure for every scooter.
Inspect the tread for glass, wire, stones and other debris. Removing a shallow object before it works through the rubber may prevent a puncture. Replace tires with worn tread, sidewall cracking or an uneven shape.
Riding technique matters too. Slow down for potholes, curbs and broken pavement. A sharp impact can damage the tube, bead or rim even when no object penetrates the tire.
Sealant can help with some small punctures in compatible tubed or tubeless tires. It cannot repair a torn sidewall, damaged bead or large cut. Confirm compatibility before adding it, particularly when the tire already contains a factory-applied sealing layer.
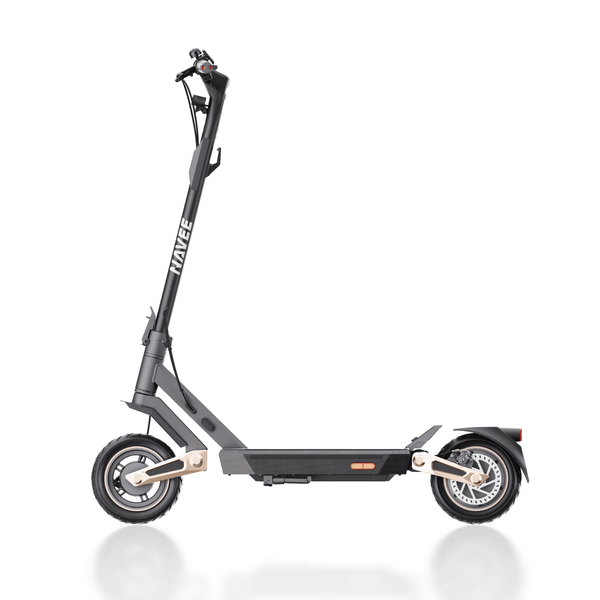
Preventing flats also starts with tire design. Among NAVEE’s electric scooters, the NAVEE ST3 uses 10-inch self-sealing tubeless tires with an internal gel layer designed to seal punctures up to 4 mm. This helps reduce pressure loss from small tread punctures, although larger cuts and sidewall damage still require inspection or tire replacement.
$719.99
$1,189.99
1000W Max Power60 km Max RangeDual Damping Arm™ Suspension10-Inch Self-Sealing Tires
Shop Now
FAQs About Electric Scooter Flat Tire Repair
Can You Ride an Electric Scooter With a Flat Tire?
No. Riding on a flat tire can damage the tire, rim and motorized wheel. It also reduces grip and steering control. Stop riding as soon as the tire loses pressure.
Can an Electric Scooter Tire Be Patched?
Small punctures in the tread area of many tubed and tubeless tires can be repaired. Sidewall cuts, damaged beads, exposed cords and large holes normally require tire replacement.
Why Does My Electric Scooter Tire Keep Going Flat?
Common causes include low pressure, hidden debris inside the tire, an incorrectly installed tube, a damaged valve, a sharp rim edge or worn rubber. Replacing the tube without finding the underlying cause will not solve the problem.
Does Tire Sealant Work on Electric Scooters?
Compatible sealant may close small punctures or slow leaks. It is not suitable for every tire and cannot repair structural damage. Follow the tire or scooter manufacturer’s instructions.
How Long Do Electric Scooter Tires Last?
There is no reliable lifespan that applies to every scooter. Rider weight, tire pressure, road surface, braking, temperature and tire construction all affect wear. Replace the tire based on its condition rather than mileage alone.
Conclusion
Electric scooter flat tire repair begins with diagnosis. Find the leak, confirm the tire type and repair only damage that can be fixed safely. Replace tires with sidewall, bead or rim damage, and seek professional help when the motorized wheel is involved. The goal is not merely to restore pressure, but to make the scooter safe to ride again.